As has been addressed before, movies and the movie filter provide one of the most significant advantages of SwiftVis over other tools that people use for analyzing Swift or other N-body simulation data. The movie filter is a single source filter, so it only accepts one input. A situation that occurs fairly frequently is that you have done multiple simulations of similar systems and you want to be able to compare them by watching them evolve side-by-side. This can be accomplished fairly easily, but not by connecting the multiple sources to the movie filter. Instead, this is best accomplished by having the other sources go through selection filters that get information on the time step from the one movie filter. Let's walk through how we can set this up.
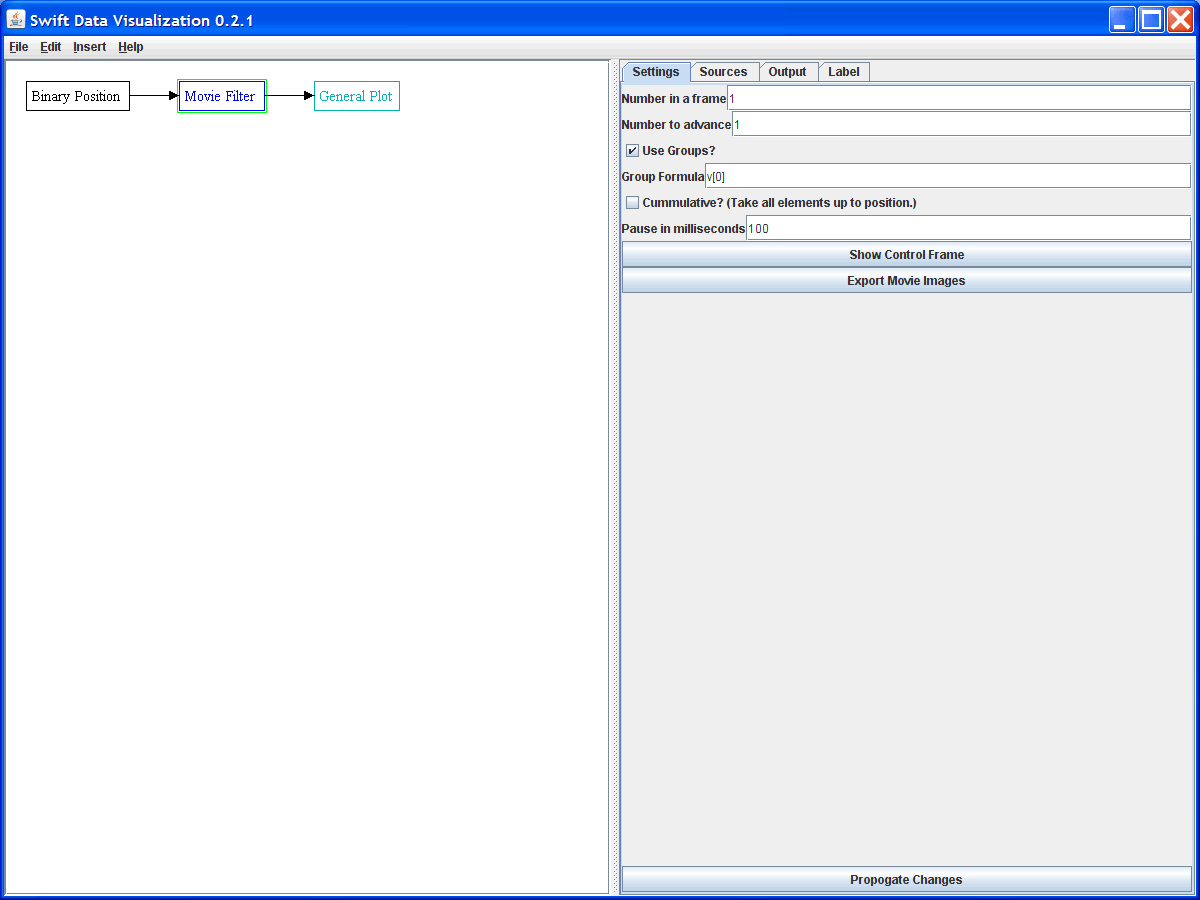
We begin with the normal inclusion of a Binary Position source and link that into a Movie Filter. By telling the filter to use groups we will be taking data in whole time steps. For now we will only let one time step go through. This is the most common case and there is a nice shortcut we can use. We'll deal with the more general situation later. The figure below shows the settings we are using for the movie filter here. Note that the movie filter has been attached to a plot to display the information on the population at the current time. We will want this to display the information from several other simulations as well.

Now we can add in the data sources for the other simulation. We will connect each of these to a selection filter as shown in the figure below.
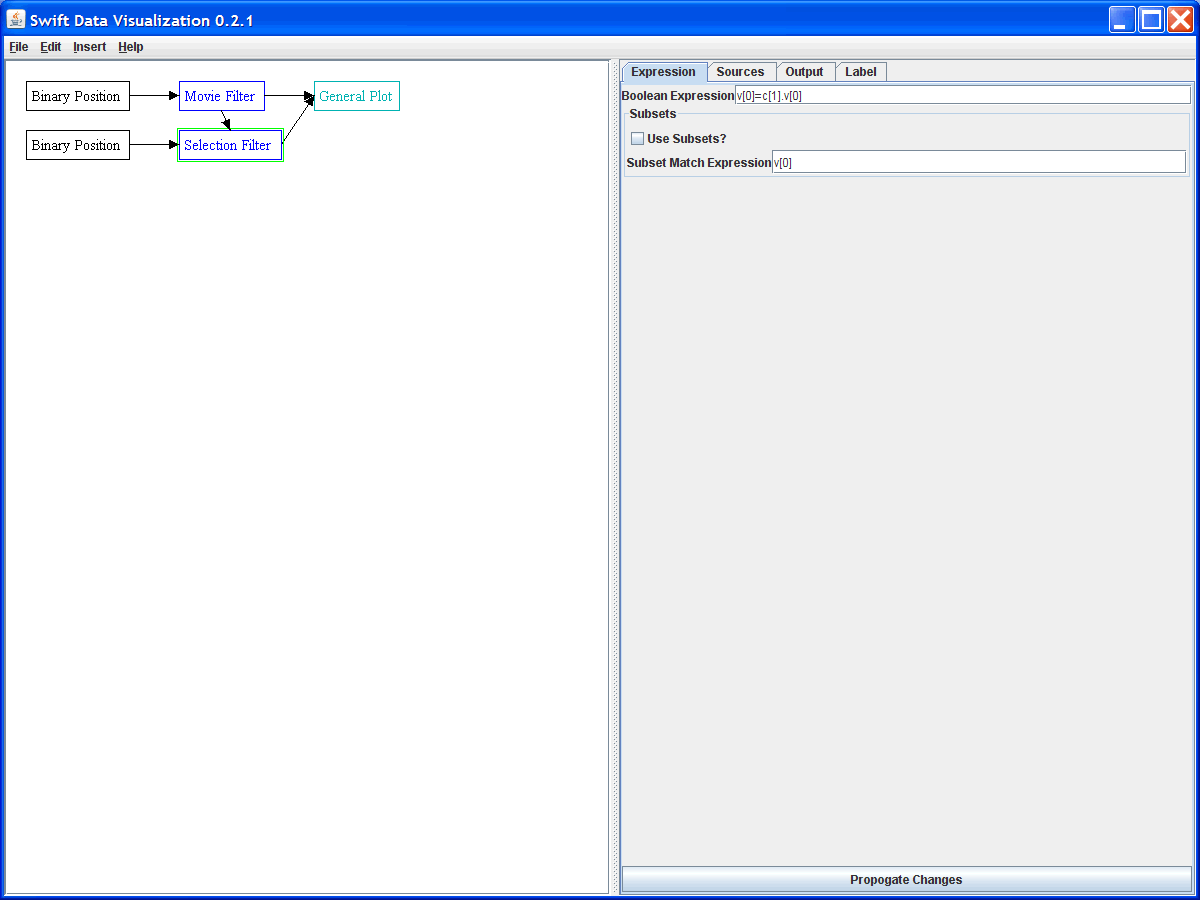
When we are only showing a single time step, we can accomplish our task by drawing a connection from the movie filter to each of the selection filters as is shown in the figure below. Note the formula in the highlighted selection filter. It is v[0]=c[1].v[0]. This needs some explanation. The selection filter pulls elements from the first input it has. That is why we connected to the other data sets first. We only want to select elements where the time value is equal to the time value that the movie filter is letting through. At this point you should be familiar with the d[#].v[#] notation. The c notation is similar, but it can be used for constants. Instead of running through all the elements, this will use the first element in the specified input. So c[1] tells it to work with the first element of the movie filter and pull the time from that.
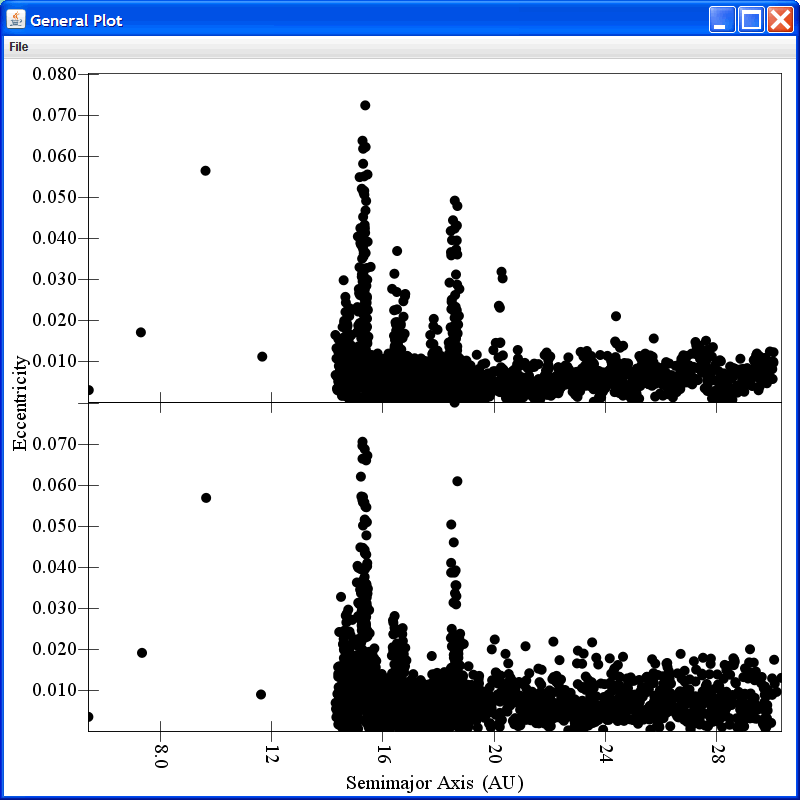
If we set up the plot appropriately, we can add in one plot area for each of the simulations and plot them all in a vertical stack. As we adjust the movie filter slider, it changes all of the filters and we get the proper set of elements from all of the simulations as shown in the figure below.
Multiple Timesteps
A less common situation is where we want the movie filter to let through several time steps from each simulation. In this case we can't simply use the c notation because we need to know the time for both the first and the last time step that the filter is letting through. The c notation only looks at the first element (we can use a fixed offset, but that still isn't sufficient in this case) and it doesn't work with the selection notation. So in this case we need to introduce one extra filter. We have the movie filter connect to a constant filter and we send the constant filter into the selection filters instead of going directly from the movie filter. The constant filter allows us to take expressions and propagate them over an arbitrarily large number of elements. The figure below shows this setup with the constant filter selected so that you can see the options on it. Two values are being calculated. These are basically the minimum and maximum times. You can see that the minimum uses a formula of {0, min v[0]} v'[0]. Like with the expression c[1].v[0] above, the constant filter typically pulls from the firsts element in a data source. However, unlike the c expression, the constant filter can use group selection. By giving a constant for the group value we are putting all the elements in a single group. We then select the minimum/maximum time and use that for the value of the expression.
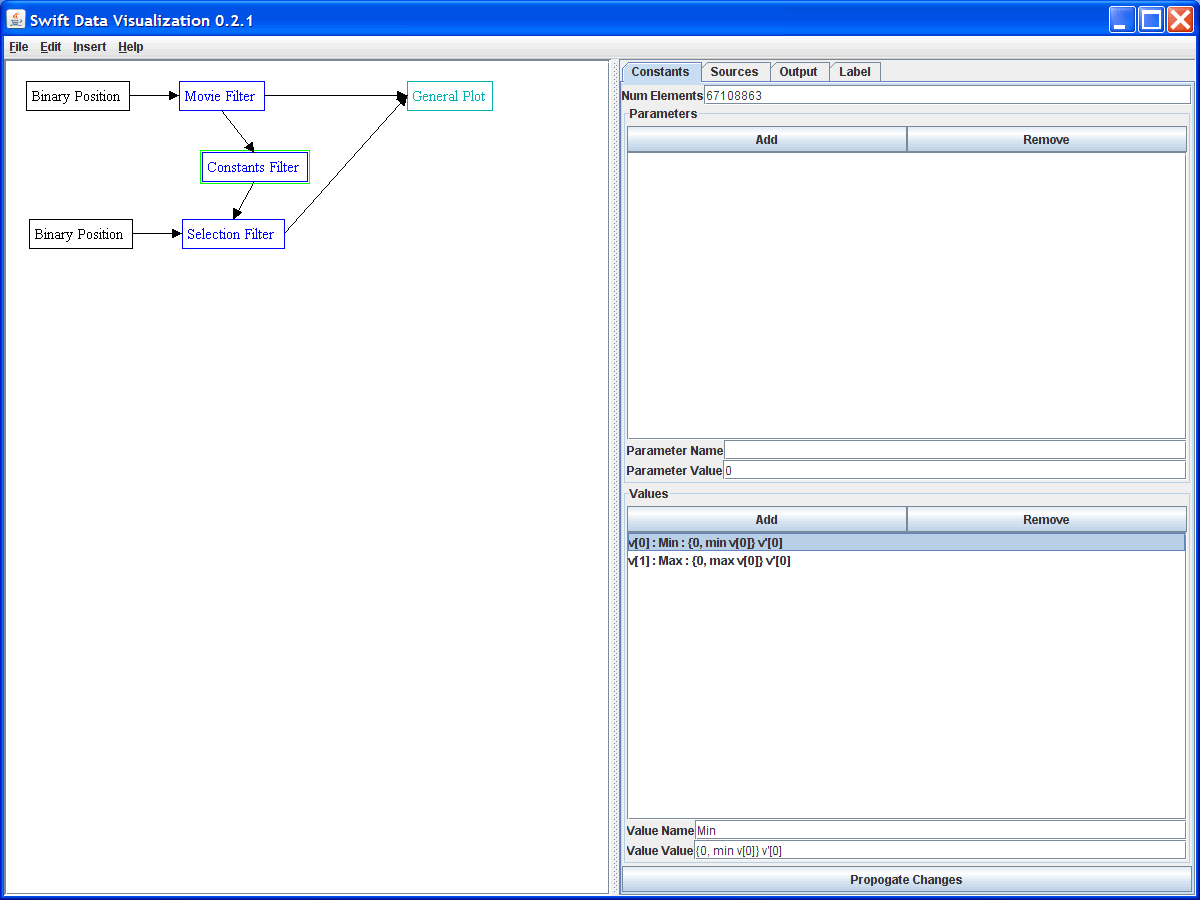
Now in the selection filters we change the formula to be v[0]<=d[1].v[0] & v[0]>=d[1].v[1]. This will pick all elements between the smallest and largest time values that are present in the movie filter output.
Current Timestep and Cummulative Data
A closely related problem to showing multiple data sets in a movie is that of wanting to have a movie that shows data from the current time step as well as cummulative data from the whole simulation up to that timestep. The movie filter now has a checkbox so that you can choose whether you want to have the movie take all the data up to a given point, a cummulative approach. However, a single filter can't have two different outputs in SwiftVis so we have to use a method similar to what was done above.
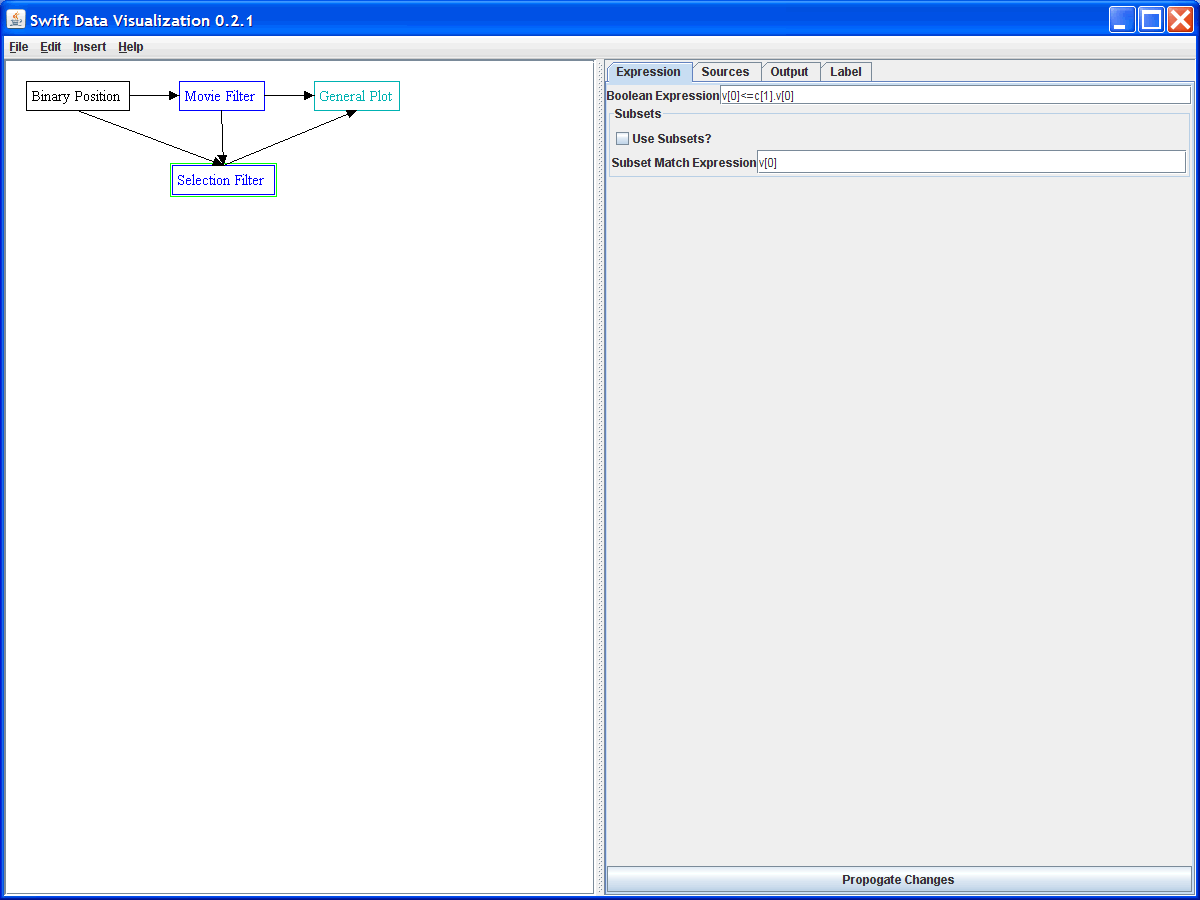
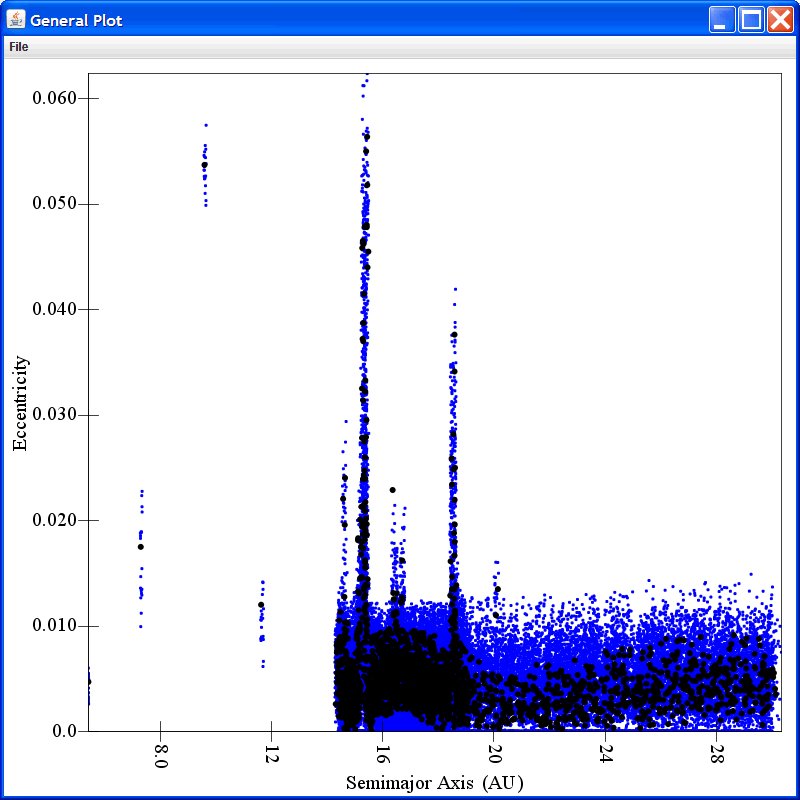
The easiest approach is to have the movie filter take a single timestep and then use a selection filter similar to the first case shown above but with v[0]<=c[1].v[0] so that all elements with a time equal or prior to that for the movie filter come through. The two figures below show this setup and a plot that might be created from it. Here the values for all particles up to the current time are plotted with small colored points and those for the current time are the larger black points.
