Sequence Editor
An often underestimated function of Blender is the Sequence Editor. It is a complete video editing system that allows you to combine multiple video channels and add effects to them. Even though it has a limited number of operations, you can use these to create powerful video edits (especially when you combine it with the animation power of Blender!) And, furthermore, it is extensible via a Plugin system quite alike the Texture plugins.
Learning the Sequence Editor
Relevant to Blender v2.31
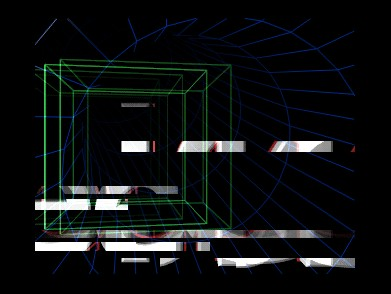
This section shows you a practical video editing example exhibiting most of the Sequence Editor built in features. We will put together several Blender made animations to obtain some stunning effects. One frame of the resulting edited animation is in Figure 1.
First animation: two cubes
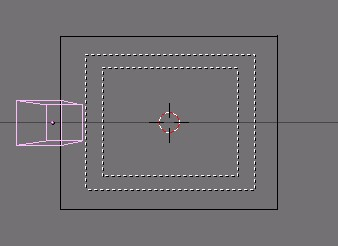
Let's start with something simple and see where it leads. Start a clean Blender and remove the default plane. Split the 3D window and switch one of the views to the camera view with NUM 0. In the top-view, add a cube and move it just outside of the dotted square that indicates the camera view. Figure 2.
We want to create a simple animation of the cube moveing into view, rotating once, and then disappearing. Set the animation end to 61 (set the End: value in the Anim Panel of the Scene Context, Render Buttons F10) and insert a LocRot KeyFrame on frame 1 with IKEY and selecting LocRot from the menu which appears. This will store both the location and the rotation of the cube on this frame.
Go to frame 21 (press UPARROW twice) and move the cube closer to the camera. Insert another KeyFrame. On Frame 41, keep the cube on the same location but rotate it 180 degrees and insert another KeyFrame.
Finally on frame 61 move the cube out of view, to the right and insert the last KeyFrame.
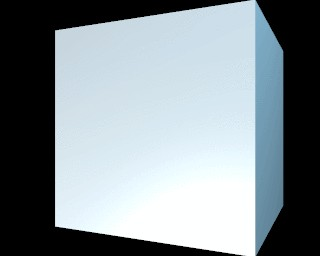
We will need two versions of the animation: one with a solid material and one with a WireFrame. For the material, we can use a plain white lit by two bright lamps - a white one and a blue one with an energy value of two (Figure 3).
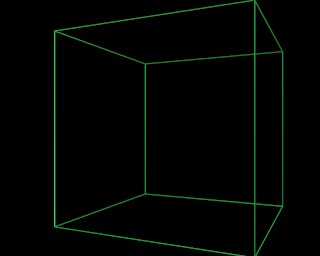
For the WireFrame cube, set the material type to 'Wire' and change the color to green (Figure 4).
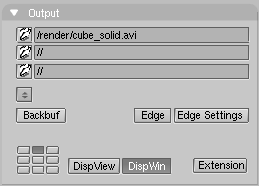
Enter an appropriate filename (for example 'cube_solid.avi') in the Pics field (first text button on top) of the Scene Context Render sub-context Output Panel (F10) (Figure 5).
Render the animation with the white solid cube. This will save it to your disk. Save it as an AVI file. Use AVI Raw if possible, because it yelds an higher quality - compression should be the last thing in the editing process - otherwise, if short of disk space use AVI Jpeg or AVI Codec, the first being less compressed and hence often of higher quality.
Now change the material to the green wire frame, render the animation again, saving the result as cube_wire.avi.
You now have a 'cube_solid.avi' and 'cube_wire.avi' on your hard disk. This is enought for our first sequence editing.
First Sequence: delayed wireframes
The first sequence will use only the wireframe animation - twice - to create an interesting effect. We will create multiple layers of video, give them a small time offset and add them together. This will simulate the 'glowing trail' effect that you see on radar screens.
Start a clean Blender file and change the 3D window to a Sequence
Editor window by pressing SHIFT F8 or by
selecting the Sequence Editor icon
 from the window header Window Type Menu.
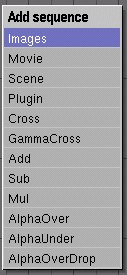
Add a movie to the window by pressing SHIFT-A and selecting Movie (Figure 6) or by using the Add>>Movie Menu entry. From the File Select Window wich appears select the wireframe cube animation that you made before.
After you have selected and loaded the movie file, you will see a blue strip that represents it. After adding a strip, you are automatically in grab mode and the strip follows the mouse. The start and end frame are now displayed in the bar.
Take a closer look at the Sequence Editor screen now. Horizontally you see the time value. Vertically, you see the video 'channels'. Each channel can contain an image, a movie or an effect. By layering different channels on top of each other and applying effects, you can mix different sources together. If you select a video strip, its type, length and filename will be printed at the bottom of the wind