Unwrapping Suzanne
Relevant to Blender 2.34
by Claudio 'Malefico' Andaur
When dealing with complex models like characters, the need for more powerful tools becomes apparent. Since Blender 2.34 several new tools have been incorporated into the Blender source code, like Seams and the LSCM unwrapping method.
In this tutorial, I'm going to use two approaches to fully unwrap Suzanne to show you how to use these new tools.
Easy as it "seams"
A mesh can be organized with the use of seams which provide a nice way to create "Face Groups" prior to doing an unwrap. These "groups" are just a way to call a selection of faces, and not a separate entity like Vertex Groups are. Seams are created by selecting a loop of vertices in Edit Mode and pressing CTRL-E or, using the menus, by selecting Edge Menu->Mark Seam sub-option. A thick continuous line will be drawn in the 3D window showing the newly created Seam. It is possible to visualize this seam both in Edit Mode and in Face Select Mode activating the Draw Seams option in the Edit buttons.
Once a closed seam is marked, we can select each side of the model in Face Select Mode, by selecting first a face, and then pressing the LKEY. All connected faces that are isolated from the rest by this seam will be selected. By strategically creating seams in our model, we will be able to work later on with this group of faces only, thus greatly simplifying our job.
Ideally we should mark a seam wherever we want the UV map to have "cuts". For instance to isolate the arms of a character from its torso, we should mark a closed seam in each shoulder. There will be cases where we will not need to mark a closed seam but an open one.
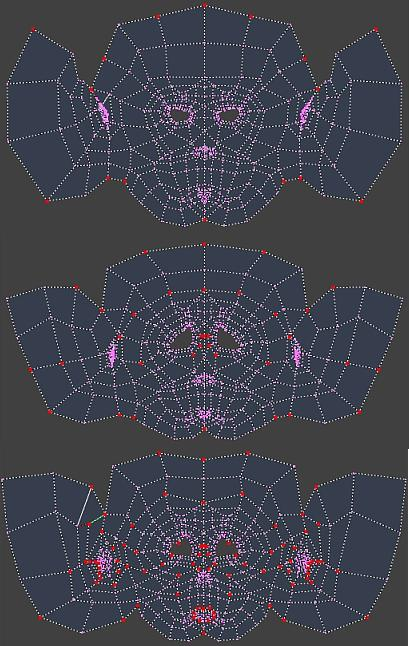
Let's do some tests. Add a Suzanne to our scene, and select the vertical central loop of vertices, be sure to completely select it. Press CTRL-E to mark this loop as a seam. Let's test it, enter Face Select Mode, we should see the seam. Select a face, and the press LKEY, all faces from this side should have been selected. Had the whole model been selected instead, this would mean that we have missed some vertices from the central loop, if this is the case please go and select the missing vertices. Easy, right ? That's the idea.
Create some more seams, try to isolate complex zones from each other, like the ears from the head. When we unwrap it, these seams will act as cuts in the surface and also in the UV map.
Remember using the vertex loop selection tool ALT-B to help you in selecting vertex loops for seams. An interesting loop to add a seam to is the main face loop of Suzanne, so we can separate the front side from the back.
Unwrapping the mesh
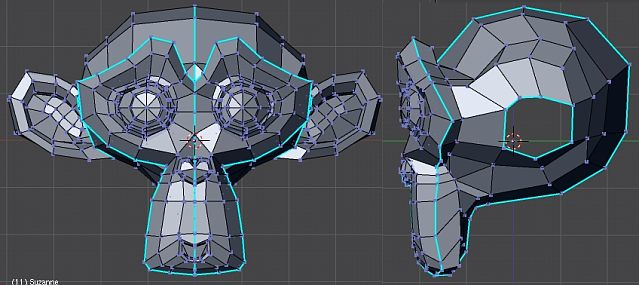
Open an UV Editor window besides the 3D viewport. Now select the model and enter Face Select Mode.
Select the faces in the left and right side of Suzanne's head including the ears. We are going to unwrap these groups using the Sphere option which will give us a nice starting point for LSCM later on. It is very likely that you'll get something "almost" perfect. However, I always get a couple of faces on the wrong side of the map. This can be easily fixed by hand, but I'm such a lazy guy that I will not do anything at all. Press CKEY in the UV Editor to enter Active Face Selection mode. Select some of the faces around the "ears", just the ones that look radially unwrapped. Leave this mode and select the vertices in the upper central zone. The ones in the central lower part are a bit tricky. We will do them in a while. Now, with these vertices selected, press PKEY. This is the Pin command. It will fix the locations of the selected vertices so "nothing" can damage our layout. More on this later.
Now that we have pinned the nicely unwrapped vertices, unselect everything in the 3D window apart from the two faces in the chin. In the UV Editor, pin the central two vertices of these faces that were unaccessible previously. We are almost done.
Now it's time for some LSCM magic. In the 3D window select all faces linked to the ones in the chin, (use LKEY, remember?). You should not select the ears this time. The selected faces should appear mapped in the UV editor. Now press EKEY. Blender will ask about doing LSCM. Accept the query. Wonderful things will happen. Suddenly, the "unpinned" faces will be relocated to a nicer location, overlapping of faces is magically fixed. Cameron Diaz is on the phone.
If you select the ear faces in the 3D window, you will see they are still there, don't worry about them right now.
Now we should make some space in the map for the front faces. We can do this by selecting the border vertices and scaling them. The UV Editor supports the Proportional Editing Tool (OKEY) just like meshes. It is very useful for making some space here without overlapping faces.
Once we have made some space, select the front faces, set the viewport to the front view, and mapped the faces using the "From Window" option. Scale them down a bit in Y or X so they fit in the space we have reserved for them in the map. Just press SKEY followed by YKEY or XKEY like you would do with meshes.
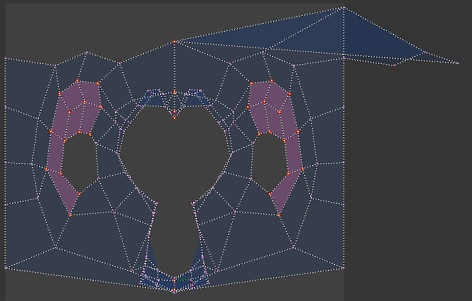
We now have the front faces nicely unwrapped in the UV Editor.
If we unselect the currently selected faces in the 3D window, we will not be able to see them anymore in the UV editor, but you can activate the Draw Shadow Mesh option in the UV editor's View menu to help you visualize the unselected faces.
Stitching the Map
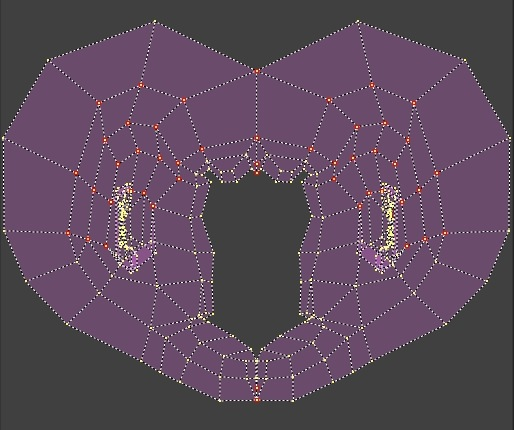
Now we need to join these two "islands". Activate Stick UVs to Mesh (CTRL-C) so we can select all UVs to be stitched at once. Select a UV vertex from the face contour, you will see its homologous in the other island selected too. "Stitch" them together by pressing VKEY. They will merge into a UV located at the middle of the original ones.
Now, it might be a little tedious to continue vertex by vertex. Select all vertices in the border of Suzanne's face. Now stitch. Pin the selected vertices. Remember to pin only if there are no overlaps. If after a stitch, there are overlapping faces, keep stitching the rest and do not pin the stitched vertex.
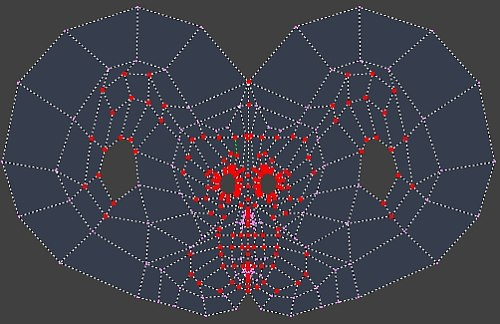
Now we have both islands stitched. However there are zones where faces are overlapped. Be sure to have pinned the "nice" vertices and do some LSCM again. Just press EKEY, you don't need to select anything. If you do well, each LSCM step will fix vertices location at overlapping faces, that you should pin to "keep".
Feel free to scale or move the vertices before doing a LSCM calculation but always select pairs to keep the symmetry controlled.
Again, please ;-)
All right. We have used a bunch of tools and got a more or less decent UV map. However in honor to truth, we could have done it a lot faster and better.
These seams I marked, do not have to be "closed" necessarily. As I stated before, these are only cuts in the surface which Blender will use to unfold it. So, if we are clever enough we could do almost all the work in one or two LSCM steps.
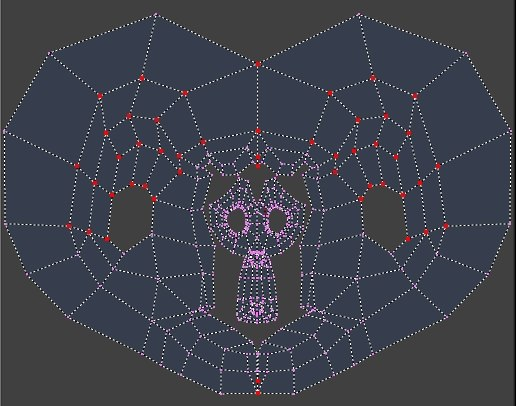
Unmark all seams in Suzie. The main idea is to keep the stretching areas as far from the view as possible. Like a plastic surgeon, we don't want to leave our "seams" in evidence. So, I will mark a seam from somewhere in the middle of the top part of Suzie's head, to somewhere near the chin, without touching the face. I've just loop selected the central vertex loop, and then unselected the vertices near the face. Mark it as a seam. Notice that this seam is "open" meaning it's not a complete loop around the head as in our first unwrap.
Now I've selected a short loop from the initial vertex of the previous seam, to somewhere near one ear. Then select the symmetrical loop and marked both as seams. That's all.
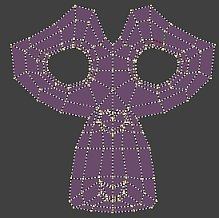
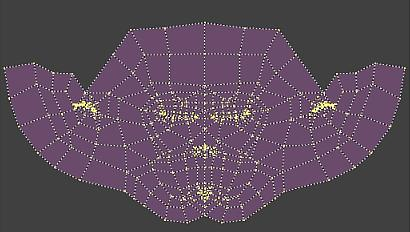
Select all faces except the eyes faces, and unwrap them using LSCM. This definitely looks better.
Now, we can stitch and pin some vertices just like we did before, but with a lot less work.
Finishing it up
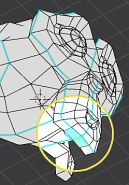
Now we are going to use the methods explained before, to fix all overlapping faces in Suzanne's ears.
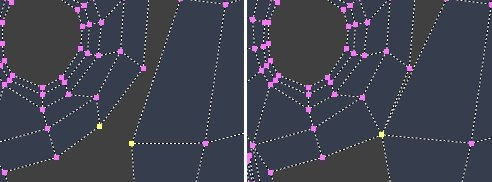
First, try to separate the outer UVs from both ears, by selecting them and scale them in X. Pin the UVs and do a LSCM step. You will see that ear UVs start to unfold. Continue with an inner pair of UVs and scale them and move them away from the center of each ear. Pin the newly moved UVs. Do a LSCM step after every pinning. After a couple more steps, things should look pretty clear.
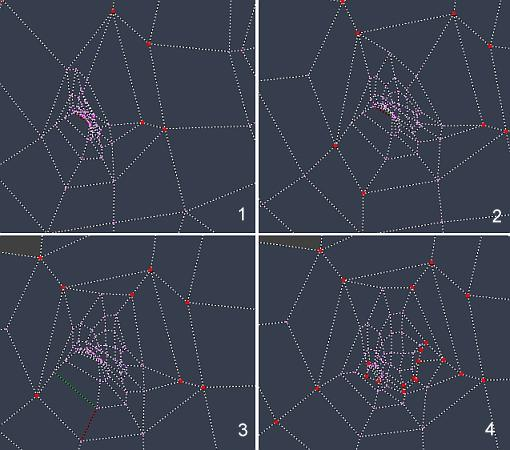
You can help yourself selecting whole faces from the inner part and scale them. You can even select the whole ear and rotate them 5 or 10 degrees clockwise and anti-clockwise (depending on each ear).
With a little patience, you will get an almost completely pinned ear, with no overlapping whatsoever.
There is no too much work to do. We can select the eyes face groups and map them From Window or LSCM. Since the eye meshes are not linked to the rest of the mesh, the Stitch command will not work. If you want to merge the eyes with the rest of the face you will have to do it with the Weld command (WKEY) instead. However I prefer having them aside, so when painting the texture I can give some extra detail to the eyes more comfortably.
If your character has eyelids, it is advisable to uvmap them almost closed in order to have a nice surface to paint the texture later on.
What now ?
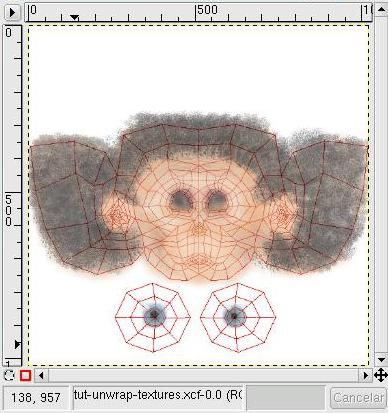
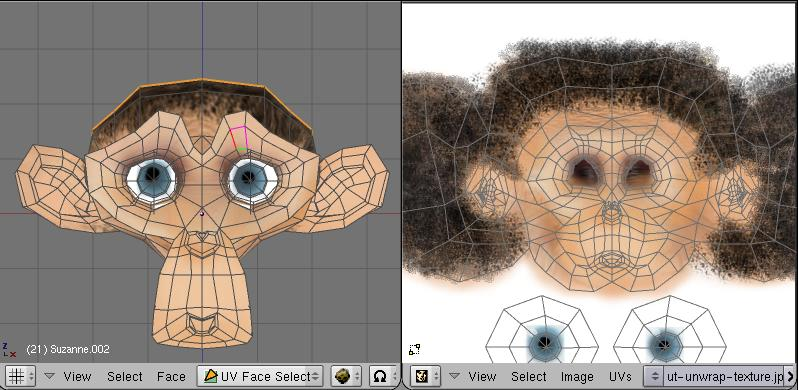
Once we have completed the unwrapping, we can export it using the Save UV Layout option in the menu, which will launch a Python script included with the Official Blender Release. There you have to set the Image size (remember that the UV layout is a square image), and set a proper name to it. It will save a TGA image of your UV map which you can load into Gimp, Photoshop or any other software, as a reference layer for painting your texture.

To be able to use this UV map as a reference, you need your 2D software to be able to manage transparent layers. In my case I chose Gimp since I work on a Linux box, but you can use whatever you find suitable.
Create a new image, same size as the UV map, and load the map into one layer. Add a few more layers on top of the map layer. I have created three layers, named COLOR, BUMP and SPEC-REF. These will generate three different images which I will use as separate texture maps for Col, Nor and Ref/Spec channels in my Blender material. However you might want to use a unique texture map for everything. The good thing about using several textures is that you can for instance tweak the Bumping of your material without altering the Colour work.
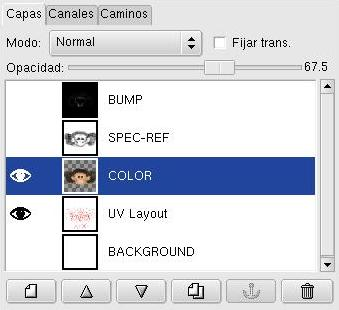
I have switched every layer off except for the layer I'm working on, and the UV map layer. You must reduce the opacity of the working layer so you can have a view of the UV map all the time.
The colour map doesn't have too many mysteries. These colours will be mapped over the model exactly as they look. The SPEC-REF and BUMP textures are a little more sophisticated. Everything in white will look as "more reflective" this is more lighted, in the first case, or "bumpy" in the second case. The black areas at the contrary will look darker or depressed respectively.
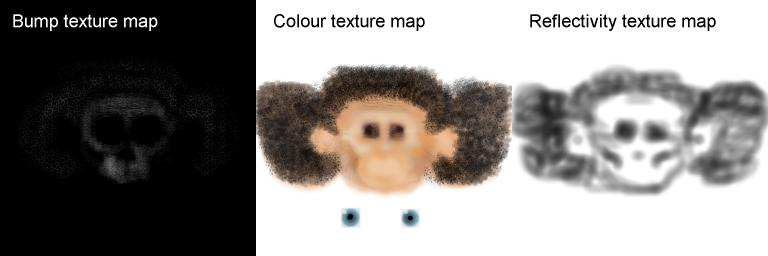
You can generate as many texture maps as channels you have available in Blender, counting Raytraced Mirroring, Translucency, Emit, Specularity, etc. All these texture maps will share the same UV map as long as you indicate it so using the UV option in the Texture Coordinate Input panel in the material buttons.
To use this texture maps we have created, we need to create first a material, and then the required Image textures. Take care in activating the UV option for every texture map, and applying to the intended texture channel. If you use the Colour map for Bump, it will look a little weird. You can mix a material colour with the Colour map if you feel so. Just slide down the Col slider for that texture.
You only need to load the texture map in the UV editor if you want to tweak the map based on the how the texture looks, or if you want to do some extra paint on it using the texture painting tools. Otherwise it's not really needed to get your render done.
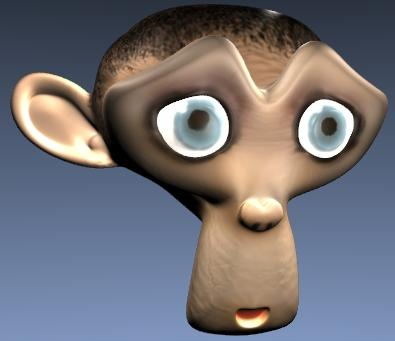
Well, there is no much left to say about UV texturing. In the rendered example I have used two materials with almost the same settings for the head and the eyes. I have used a non-zero value for Emit in the eyes, but everything else is the same. You can tweak the UV map, so the texture map fits better if you need it.
See you and keep blending !