Part 2
Instead of instructing you to modify the settings here and there, I thought it might be better to explain the Yafray light types one by one. This will enable you to make informed decisions.
Let there be light... And there was Yafray everywhere
There are five light types used in Blender and of them only four are directly supported in Yafray. On enabling Yafray raytracer from the Render tab, you initially see six lamp types (in the lamp options window, F5), of which Yafray makes use of Blender's lamp, area, spot and sun. I will come later to the other two lamps listed, Hemi and Photons later.
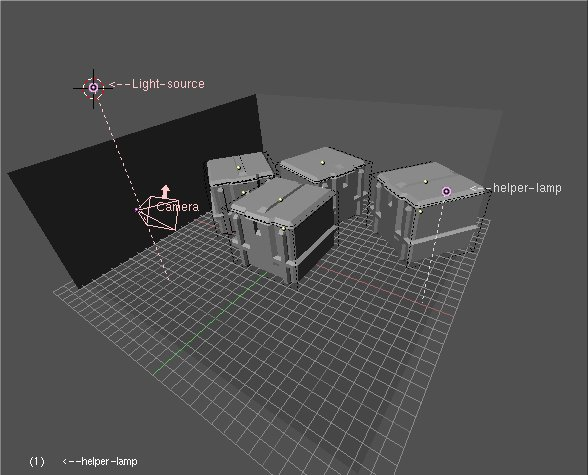
The scene description: The current scene has two light sources. One is a helper light (Sun, without shadow and at value .200), which is used to provide non-directional light to increase the ambiance for the scene. The other is the lamp source (or light source), which is a placeholder for every light type explained. The lamp positions are static through out, and Ray Shadow (shadow casting) is enabled for all the lamp sources that are being used (see Figure 8).
 | The suggested uses for the light types defined here are general in the usability approach. They are not to be taken as the absolute word for lighting your scene. The lighting varies depending on the scene and the artists own vision for the scene. For best results experiment with the lights in your scene to find which works best for you. |
 | Important |
|---|---|
The mention of render times in the images is rounded off, it is relative and is used just to give the idea of typical render times for same scene by different lights and settings. |
Lamp
This is the simplest light source available, in some ways it is like sun, as it is omni-directional (i.e. shoots light in all directions from the point of its origin) and is spherical in nature. Since it shoots light rays in every direction, that means the ray going away from the scene will not make any visible changes in the scene, the light rays will be lost and thus are waste of computation, Although Ray tracers use a variety of hacks by cutting off the unwanted computations, it is a bit slower than other directional light sources if bigger parts of the light shot come inside the scene view.
The general use of Lamp is for indoor lighting, like rooms and halls, but it is not limited to this use, it is also more commonly used as filler light or helper light in the scene.
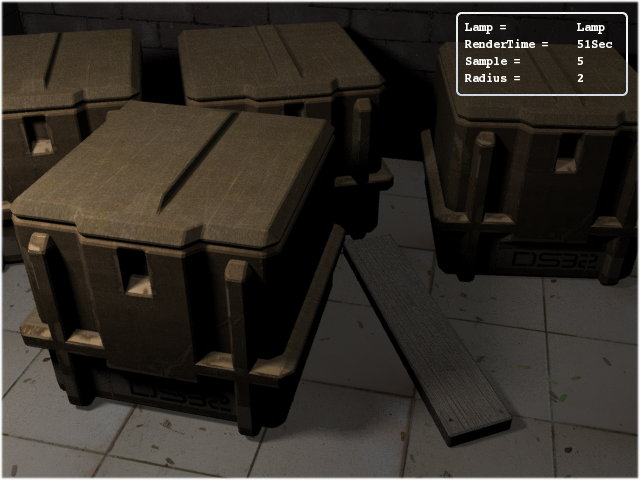
Values: When a single lamp is used for the scene in Yafray (through-out the tutorial when I say Yafray I mean Blender-Yafray), it will generally not provide sufficient lighting to light up the scene unless it is kept at a higher value. For the sample scene, the value of Lamp was set at 10 (maximum) but still there seems to be the need for additional lighting (but we are sticking to it for the sake of understanding). See Figure 9.

The Lamp will cast sharper shadows at default (zero) radius. The radius setting in Lamp is used to increase the area size for shooting the light. If the size of Lamp is bigger than the objects, then the light shot from some parts of the lamp could directly reach to the parts of the scene where the other part of the lamp casts a shadow. This intersection results in the shadow being diluted for that part, thus getting blurred (also called partial shadows). You can observe this phenomenon in real world (sun light).
LINK: for more info on shadow dilution or Partial shadows go to Ditto head's Light tutorial.

The scene above (Figure 10) was rendered at radius 2 with a sampling value at 1, as can be seen the scene has grainy partial shadows. The use of samples button is only to reduce those grains in shadows, the sampling buttons control the number of samples used in shadow calculations, increasing the sampling results in smoother shadows. The sampling button is only available in lamp and area light and functions the same for both.
Area
The Area Light is a directional source. The shape of Area Light can be varied from square to rectangular from the drop down list in the Lamp tab. Below the shape selection there is also an option to increase the size of the Area Light.

Values: For Area Lamp you will need lower light intensity values for rendering a scene with Yafray. The sample scene is lit by light value at 4, it is brighter than the one rendered by lamp at value 10. This is because it is shooting all the light towards a direction from a plane while the lamp shoots the light in every direction distributing energy where it may not be required.
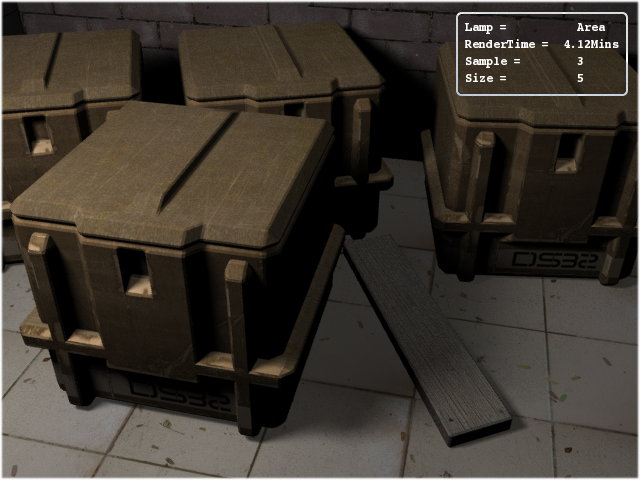
Figure 13. Although the scene looks similar to Figure 11 in the Section called Lamp but is brighter and have better shadows.
| One important point to remember is that in the official Build of Blender2.34 using two or more area lights results in error in the renderings, it is a recognized bug and have been patched in some development builds. |
Spot
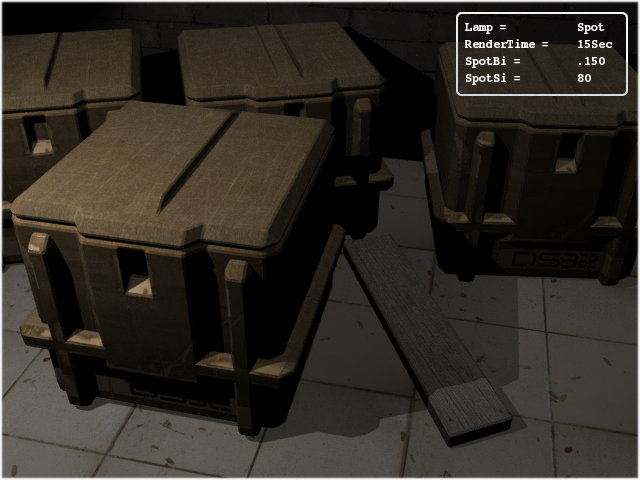
The spot is also a directional light source and as the name suggests it provides a circular spot of light or more appropriately a cone of light. The size of cone can be controlled by the SpotSi or angle of spotlight beam. The higher the angle the more nearer it behaves like an area light, but with one major difference. It cannot cast partial shadows. Spot light has a parameter to control the SpotBi or Spot's edge smoothness only. It can be seen only if the spot light is inside the scene view, otherwise you will not notice any difference in spot or other lights.
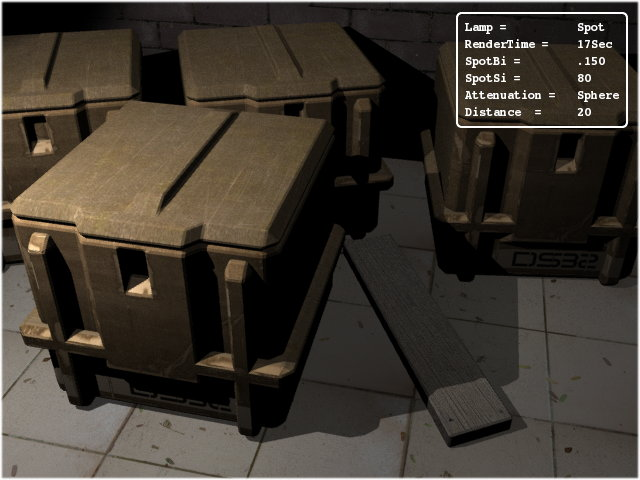
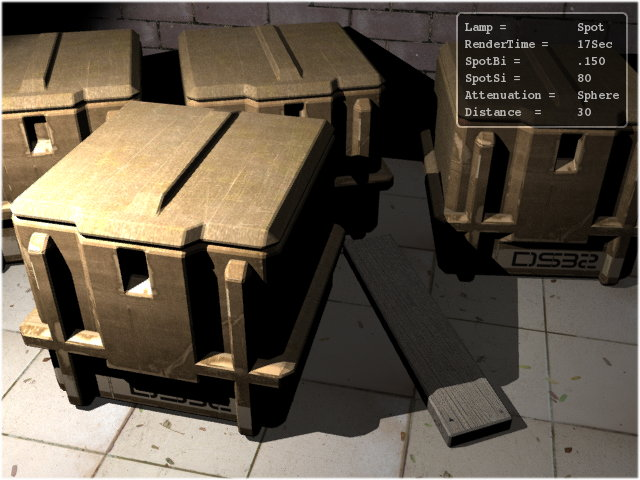
Notice the increased brightness at the portion nearer to the lamp in the Figure 15 while using the Spherical light attenuation (quad is not supported in Yafray). Increase in the distance value the spherical attenuation also increases in radius, for example the Figure 15 has a default distance value of 20 while Figure 16 has the distance value at 30. The effect looks like that of typical household lamps where the attenuation is sharper.
| The light attenuation in Yafray has only quadratic falloff, while Blender can have linear, cubic and the mix of these also. That explains relatively sharper light intensity falloff in Yafray renders. |
Sun
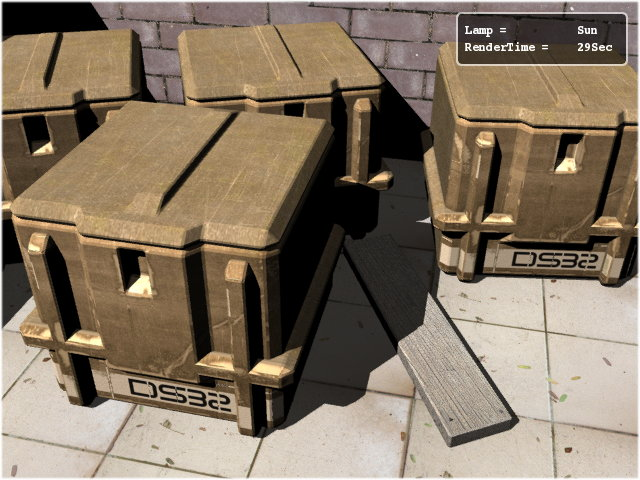
This is also a directional light source. It tries to emulate sunlight by shooting light of the same intensity everywhere in the scene without attenuation (Figure 17). This results in the environment being lit up with constant ambiance. Its value must be kept lower. The sample scene uses a light intensity value of .100. It is obviously good for out door lights, especially for a sun.
In outdoor scenes, if you do not want sharper shadows you can disable shadow casting for sun, and use other lamps for shadow generation. But make sure they have sufficient light intensity to cast a shadow.
More lamps?
Hemi - Yafray does not support Blenders implementation of Hemi light internally; right now it just uses Yafray's implementation of sun light instead, so you can use Sun light instead.
Photon - Last of all, the Photon light source or photons lamp button is not to be confused with any light source. It does not cast any shadow or light, it is only used in Caustics* calculations and requires being placed or directed where you need the caustic calculation. Photon lamp shoots photons in an area, the photons are used by Yafray as the specialized ray elements only to calculate the caustics on passing through the objects like glass or mirrors, which have have the property of bending light when passed through them, known as total internal reflection. Basically the placement of photon lamp is to allow the user to optimize the rendering. Caustics is one of the most computation intensive jobs in Ray tracing.
| This photon lamp and photons are not to be confused with the photon option in the GI method. Which is explained in the the Section called Part 3. |